Crafting a Miniature Chess Set with a Lathe: A Detailed Guide
Turning miniature chess pieces on a lathe is an exciting project for woodworkers, metalworkers, and hobbyists alike. Not only does it allow you to hone your lathe skills, but it also results in a beautiful, functional work of art. From knights and rooks to pawns and queens, each chess piece can be crafted with precision and care, reflecting your personal touch.
In this post, we’ll explore how to create a miniature chess set using a lathe, offering tips and tricks to help you achieve intricate designs and professional results.

Materials You’ll Need
Before you get started, gather the following materials and tools for your project:
- Wood or Metal Stock: Depending on your preference, you can use a variety of materials. Wood is ideal for a classic look, while metals like aluminum or brass offer a modern twist.
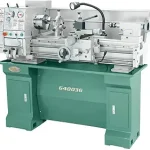
- Lathe Machine: Any small lathe will do the job, but make sure it has the precision to handle detailed work.
- Lathe Tools: A set of small, sharp turning tools is essential for creating fine details in your pieces.
- Sandpaper: Various grits for smoothing and polishing the finished pieces.
- Finish: Depending on the material, you may want to use oil, lacquer, or another finish to protect and enhance the appearance of your chess pieces.
Step-by-Step Process for Turning Miniature Chess Pieces
1. Plan Your Designs
Before you begin turning, it’s important to have a clear plan for each chess piece. You may want to sketch out the general shape and dimensions for your pawns, rooks, knights, bishops, queens, and kings. Each piece has a distinctive design, but they should all maintain a cohesive look as part of the same set.
- Pawns: Simple and small, often spherical tops.
- Knights: The most detailed piece, typically featuring a horse’s head.
- Rooks: Resemble castle towers with straight sides.
- Bishops: Slender with a characteristic notch near the top.
- Queens: Tall with a crown-like top.
- Kings: The tallest piece, often topped with a cross or similar symbol.
2. Mount the Material on the Lathe
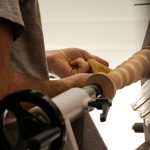
Once you’ve selected your material, cut it down to manageable blocks or rods, typically about 2–3 inches long. Mount the first piece on the lathe between the headstock and tailstock. Make sure it’s secure before you start turning.
3. Rough Shape the Piece
Begin by roughing out the general shape of the piece using a roughing gouge or skew chisel. Work slowly, focusing on removing material evenly from all sides to create a basic cylindrical shape. From here, you can gradually refine the shape until it closely resembles your planned design.
4. Add Detailed Features
Once the general shape is complete, switch to finer lathe tools, such as a parting tool or detail gouge, to carve the intricate features. For example, use a narrow tool to create the ridge on a rook or the curves on a knight’s horse head. Precision is key here, so take your time to ensure the details are crisp and accurate.
- Tip: If you’re working with small or intricate details, it’s helpful to use a magnifying glass or wear magnification goggles to maintain precision.
5. Sand and Finish
After the shaping is done, sand the piece with progressively finer grits of sandpaper, starting with coarse grit to smooth out rough edges and finishing with fine grit for a silky surface. Be sure to remove any dust before applying a finish.
- For Wood: Apply a protective finish like oil, wax, or lacquer to enhance the wood grain and protect the piece.
- For Metal: Use a polishing compound to give your pieces a high shine.
Tips for Crafting a Full Chess Set
- Uniformity: Ensure that similar pieces, like the eight pawns, are consistent in size and shape. Using calipers or a template can help maintain uniformity across the set.
- Scale: Since this is a miniature set, attention to proportion is crucial. Keep the sizes relative to one another for a visually pleasing set.
- Display Base: Consider turning a matching chessboard or display base for your set. You can turn small corner posts for a chessboard to complement the pieces.
- Creativity: Don’t be afraid to get creative with the design of your pieces. Some makers add personal or artistic touches, like custom tops for kings and queens or stylized knights.
Why This Project is Perfect for Lathe Enthusiasts
Turning a miniature chess set is more than just a woodworking or metalworking project—it’s a challenge that tests your precision, creativity, and attention to detail. Each piece requires careful planning and execution, and by the end of the project, you’ll have a one-of-a-kind chess set that’s both a functional game and a display of craftsmanship.
Whether you’re creating this set for personal use, as a gift, or even to sell, this project is an excellent way to improve your lathe skills and produce something truly unique.
Conclusion
Crafting a miniature chess set with a lathe is a rewarding project that combines precision, artistry, and practical use. With the right tools, materials, and a bit of patience, you can turn small blocks of wood or metal into intricate chess pieces that will impress anyone who sees them. Whether you’re an experienced lathe user or just getting started, this project is a fun challenge that results in a timeless game set.
Ready to get started? Gather your tools, pick your materials, and let the creativity flow as you create your very own miniature chess set!


