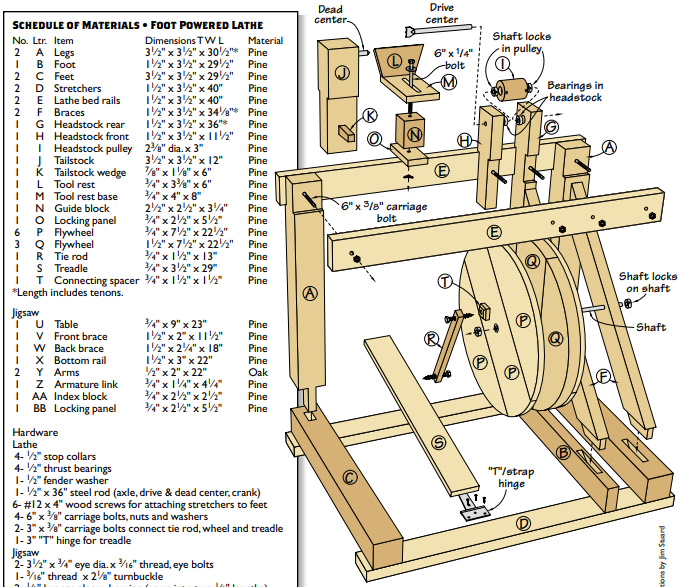
Building a foot-powered lathe is a great DIY project that can provide a fun and functional tool for woodturning or metalworking. Here’s a simple guide to help you create your foot-powered lathe:

Materials Needed
- Wood for the Lathe Bed:
- Two sturdy, straight pieces of wood (like 2x4s or 2x6s) for the bed.
- Length: Approximately 4 to 6 feet.
- Wood for the Legs:
- Four pieces of wood (like 2x4s) for the legs.
- Length: Approximately 2 to 3 feet.
- Wood for the Headstock and Tailstock:
- Blocks of wood (like 2x4s) to create the headstock and tailstock.
- Plywood or Boards:
- For the platform and base of the lathe.
- Wooden or Metal Dowels:
- For the spindle (the rotating part where the workpiece is mounted).
- Foot Pedal Mechanism:
- A strong spring (for the foot pedal return).
- A pivot point (like a bolt or screw).
- Wood for the Workpiece Support:
- A board to support the workpiece as it spins.
- Clamps and Screws:
- To secure all components together.
Tools Needed
- Saw (hand saw or power saw)
- Drill
- Screwdriver
- Measuring tape
- Sandpaper
- Wood glue
Instructions
Step 1: Build the Lathe Bed
- Cut the Lathe Bed:
- Cut two pieces of wood to your desired length (around 4 to 6 feet). These will form the base of your lathe.
- Join the Bed Pieces:
- Lay the two pieces parallel and secure them with cross supports for stability.
Step 2: Create the Legs
- Cut the Legs:
- Cut four legs from your wood (2x4s). Each leg should be about 2 to 3 feet long.
- Attach the Legs:
- Attach the legs at each corner of the lathe bed using screws and wood glue for stability.
Step 3: Construct the Headstock and Tailstock
- Headstock:
- Cut a block of wood to create the headstock. This will hold the spindle.
- Drill a hole through the center for the dowel that will serve as the spindle.
- Secure it to one end of the lathe bed.
- Tailstock:
- Create a similar block for the tailstock but ensure it can slide to accommodate different workpiece lengths.
- Drill a hole through the center for the dowel.
- Attach it to the opposite end of the lathe bed.
Step 4: Assemble the Spindle
- Insert the Dowel:
- Insert a wooden or metal dowel through the headstock and tailstock. This will be the spindle on which you’ll mount your workpieces.
- Secure the Dowel:
- Ensure the dowel spins freely by allowing some space and adding bearings or washers if needed.
Step 5: Create the Foot-Pedal Mechanism
- Construct the Pedal:
- Create a foot pedal using a sturdy piece of wood, attached to a pivot point (a bolt) near the lathe bed.
- Attach the Spring:
- Attach a spring to return the pedal to its original position after being pressed.
Step 6: Set Up the Workpiece Support
- Install the Support Board:
- Attach a board underneath the spindle to support the workpiece as it spins.
- Ensure it’s positioned to catch any shavings or debris.
Step 7: Final Adjustments and Testing
- Adjust the Tailstock:
- Ensure the tailstock can move to accommodate various workpiece lengths.
- Test the Mechanism:
- Press the foot pedal to see if the spindle spins smoothly and make any necessary adjustments.
Additional Tips
- Safety First: Always wear safety goggles and appropriate clothing when working with power tools and when using the lathe.
- Practice Makes Perfect: Start with smaller and simpler projects to get accustomed to using your foot-powered lathe.
- Fine-Tuning: You may need to fine-tune the tension on the pedal or adjust the spindle to ensure smooth operation.
By following these steps, you can create a functional foot-powered lathe that can be used for a variety of projects. Enjoy your woodworking or metalworking!


